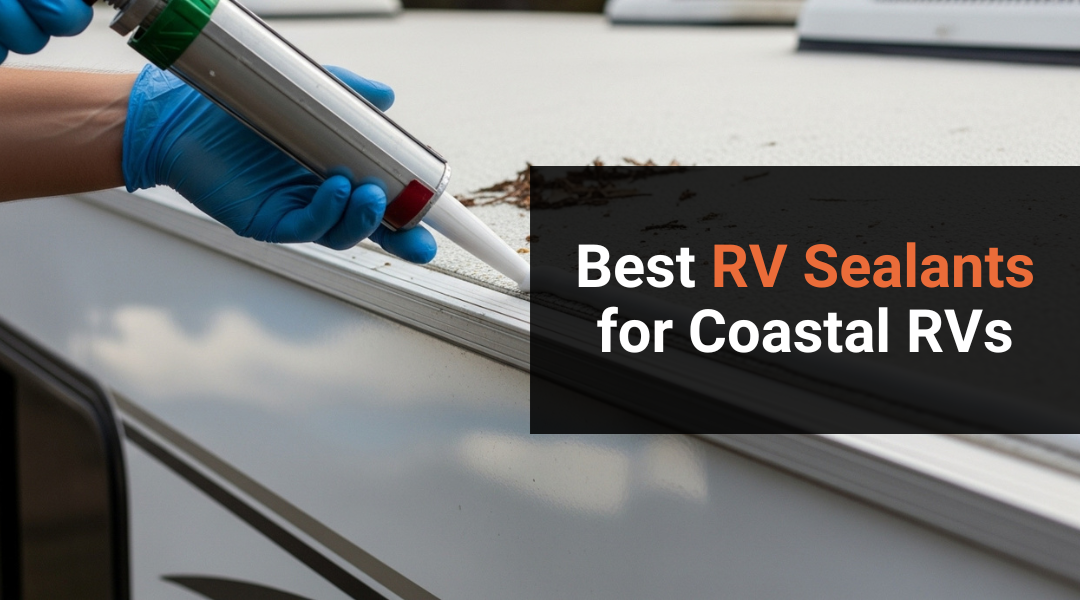
Coastal air can do more than rust metal—it can quietly wear down your RV’s roof, seams, and seals. Living or traveling near Huntington Beach means your RV faces salt, humidity, and sun exposure that speed up sealant deterioration. The best RV sealants for coastal climates protect against salt corrosion, UV damage, and moisture intrusion, keeping your vehicle watertight and road-ready year-round.
You’ll learn how coastal conditions challenge even the toughest materials and what sealant types stand up best to the ocean air. This guide walks through how to apply and maintain those protective layers, what costs to expect, and how to avoid the common sealing mistakes that lead to costly roof leaks.
When it’s time for professional help, Farace’s Automotive & RV Center in Huntington Beach offers the expertise and craftsmanship to restore and protect your RV with precision. Their long-standing reputation and full-service approach ensure your vehicle stays sealed, secure, and ready for the next trip along the coast.
Why Coastal RVs Face Unique Sealant Challenges
RVs near the ocean encounter faster wear on sealants because of constant exposure to salt, moisture, and sunlight. These environmental factors combine to weaken adhesion, shorten service life, and increase the need for regular inspection and reapplication.
How Salt Air, Humidity, and UV Exposure Break Down Standard Sealants
Salt air deposits fine crystals that corrode metal trim and degrade sealant surfaces. Over time, this causes pitting, peeling, and loss of flexibility. You may notice chalky residue or small cracks forming around seams and vents.
High humidity keeps surfaces damp, preventing sealants from curing properly. Moisture trapped beneath coatings can lead to blistering and mildew growth.
Intense UV exposure compounds the problem. Prolonged sunlight breaks down chemical bonds in silicone and acrylic sealants, causing discoloration and brittleness. Using UV-resistant, marine-grade, or polyurethane-based products helps maintain elasticity and bond strength in coastal conditions.
Step-by-Step: How to Seal and Protect Your RV in Coastal Conditions
Coastal air carries salt, humidity, and sun exposure that can quickly degrade exterior seals. Using the right products and techniques helps prevent leaks, corrosion, and costly structural damage while keeping your RV watertight and protected year-round.
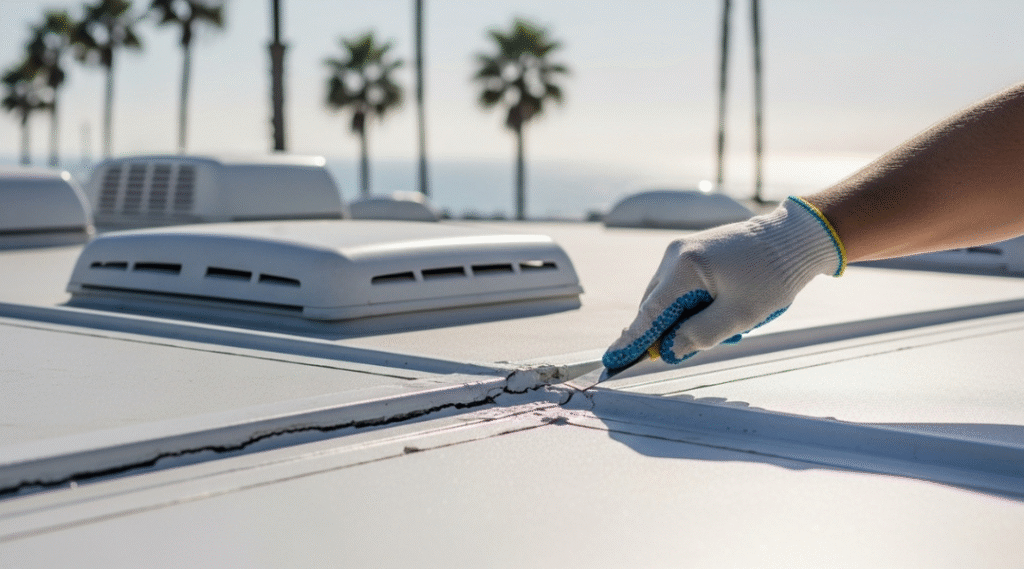
Step 1: Inspect All Seams, Vents, and Roof Edges for Cracks or Lifting
Start by walking around and on top of your RV, checking every seam, vent, skylight, and roof edge. Look for cracks, gaps, or lifting sealant where water could enter. Pay close attention to areas exposed to direct sunlight or ocean spray.
Use a flashlight and a plastic scraper to gently test older seals. If the material flakes, pulls away, or feels brittle, it’s time for replacement. Don’t forget window frames, slide-outs, and corner joints, as these often show early signs of wear in humid climates.
Keep a simple checklist to track problem spots. Mark each area with painter’s tape so you can locate them easily when applying new sealant. Consistent inspections every few months prevent small cracks from turning into major leaks.
Step 2: Choose the Right RV Sealant Rated for Salt, Sun, and Heat
Select a marine-grade or UV-resistant RV sealant designed for high-humidity and coastal exposure. Silicone, polyurethane, and hybrid polymer sealants perform well, but each has specific uses.
| Sealant Type | Best For | Key Advantage |
|---|---|---|
| Silicone | Roof vents, skylights | Excellent UV and water resistance |
| Polyurethane | Seams, joints, metal areas | Strong adhesion and flexibility |
| Hybrid Polymer | Multi-surface sealing | Bonds to fiberglass, metal, and rubber |
Avoid generic hardware-store caulks not rated for RV or marine use. They often fail under UV and salt conditions. Check the manufacturer’s temperature and curing recommendations before purchase.
When possible, use the same brand and type of sealant already applied to your RV to ensure compatibility. Mixing products can lead to poor adhesion or chemical reactions that shorten the seal’s lifespan.
Step 3: Clean and Prep Surfaces to Ensure a Watertight Bond
Clean surfaces thoroughly before applying new sealant. Remove dirt, oxidation, and any loose or cracked material with a plastic scraper or caulk removal tool. Rinse with fresh water to eliminate salt residue, then let the surface dry completely.
Wipe areas with isopropyl alcohol to remove oils and improve adhesion. Avoid harsh solvents that can damage rubber or fiberglass. Apply masking tape along edges to create clean lines and protect nearby surfaces.
If you’re resealing a roof, check that no moisture remains under old layers. Applying sealant over damp areas traps water and causes bubbling or poor bonding. Proper preparation ensures the new sealant forms a tight, durable barrier against humidity and salt air.
Step 4: Apply Sealant Evenly and Allow Proper Curing Time
Load your caulking gun with the chosen RV sealant and cut the nozzle at a 45-degree angle. Apply steady pressure to create a smooth bead along each seam. Work in small sections to maintain control and prevent uneven application.
Use a caulk-smoothing tool or gloved finger to press the sealant into gaps, ensuring full contact with the surface. Avoid overworking the material, which can cause air pockets.
Follow the manufacturer’s curing instructions precisely. Most sealants require 24 to 48 hours to fully cure, depending on temperature and humidity. Keep the RV dry during this time and avoid driving or washing it. Proper curing ensures maximum flexibility and long-term adhesion.
Step 5: Recheck Seals Seasonally for Wear and Reapply as Needed
Inspect your RV’s seals at least every three to six months, especially if parked near the ocean. Sun, salt, and temperature changes can cause expansion and contraction that weakens sealant over time.
Look for discoloration, cracks, or peeling edges. Run a finger along seams to feel for softness or gaps. When you find wear, clean the area and touch up with matching sealant rather than waiting for full failure.
Keep a small maintenance kit with sealant, scraper, and cleaning supplies in your RV. Regular upkeep prevents leaks and extends the lifespan of your roof, windows, and body seams, ensuring reliable protection in Huntington Beach’s coastal environment.
Cost Factors and Long-Term Value of Quality RV Sealants
Choosing the right sealant affects both your maintenance costs and how well your RV resists salt, moisture, and UV exposure. The durability, coverage rate, and material compatibility of a product determine whether you spend more upfront or face repeated repairs later.
How Premium Marine-Grade Sealants Save Money Over Time
Marine-grade sealants cost more initially, but they last longer in salt-heavy air and resist corrosion better than standard formulas. Their high solids content and UV-stable polymers reduce cracking and peeling, cutting down on reapplication frequency.
For example, a $70 high-grade silicone sealant can last 3–5 years, while a $30 general-purpose option may need replacing every 12–18 months. Over time, fewer repairs and less labor offset the higher purchase price.
| Sealant Type | Average Lifespan | Typical Reapplication Cycle |
|---|---|---|
| Standard RV Sealant | 1–2 years | Annual or biannual |
| Marine-Grade Silicone | 3–5 years | Every 3–4 years |
In coastal climates like Huntington Beach, investing in premium sealants provides consistent protection against saltwater oxidation and humidity-driven deterioration.
Comparing the Top Sealant Types for Huntington Beach RV Owners
Moist ocean air, salt exposure, and strong UV rays in Huntington Beach can wear down RV seals faster than in drier regions. Choosing a sealant that resists corrosion, stays flexible, and adheres well to coastal materials helps protect your RV from leaks and sun damage.
Silicone vs. Polyurethane vs. Self-Leveling Sealants — What Performs Best Near the Coast
Silicone sealants resist salt, moisture, and UV light well, making them suitable for roof edges and vents. They remain flexible but can be difficult to paint or reseal later.
Polyurethane sealants bond tightly to fiberglass and metal. They handle vibration better but degrade faster under prolonged UV exposure, so you should inspect them more often near the ocean.
Self-leveling sealants—such as Dicor lap sealant—spread evenly on flat surfaces. They’re ideal for horizontal roof seams and EPDM rubber roofs. Their flexibility helps prevent cracking when your RV expands or moves in heat.
| Sealant Type | Best Use | UV Resistance | Salt Resistance | Paintable |
|---|---|---|---|---|
| Silicone | Roof edges, vents | Excellent | Excellent | No |
| Polyurethane | Metal, fiberglass seams | Moderate | Good | Yes |
| Self-Leveling | Flat roofs, EPDM | Good | Good | No |
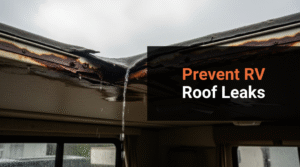
Common Mistakes That Lead to Costly RV Roof Leaks
Moist ocean air, salt, and constant sun exposure in coastal areas accelerate roof wear. Small errors in material choice or surface preparation often cause leaks that spread quickly under these conditions. Paying attention to detail during maintenance prevents expensive water damage and structural decay.
Overlooking Minor Cracks
Tiny gaps around vents, seams, or skylights may not look serious, but salt-laden moisture seeps in easily. Once trapped, it corrodes fasteners and weakens sealant bonds.
Inspect your roof at least twice a season and after heavy rain or wind. Use a flashlight to spot hairline cracks or soft areas.
A quick patch with a compatible lap sealant or tape prevents expansion and costly internal repairs later.
Using Household Caulk
Household silicone or acrylic caulks fail quickly on RV roofs. They lack UV resistance, flexibility, and adhesion to rubber or fiberglass.
Only use RV-specific sealants labeled for EPDM, TPO, or fiberglass materials. These products remain elastic and waterproof even under intense sun and movement.
Using the wrong caulk often leads to peeling, leaks, and the need to strip and reseal large sections of the roof.
Skipping Prep Work
Applying new sealant over dirt, oil, or old residue prevents proper bonding. Even a thin film of dust can cause adhesion failure.
Before resealing, clean the area with mineral spirits or RV-safe cleaner and allow it to dry fully. Remove cracked or loose sealant with a plastic scraper.
Proper prep ensures the new layer forms a continuous, watertight seal that withstands coastal humidity and temperature changes.
Why Farace’s Automotive & RV Center Is the Smart Choice in Huntington Beach
You benefit from a veteran-family-owned shop that has served Huntington Beach since 1976. The team’s long-term experience with coastal wear, salt exposure, and RV sealant failures makes them a reliable resource for maintaining watertight protection in marine-influenced conditions.
Over 40 Years of RV Roof and Sealant Repair Expertise in Coastal Orange County
Farace’s Automotive & RV Center has repaired and resealed RV roofs for over four decades in Huntington Beach’s salt-heavy air. Their technicians understand how UV exposure, ocean humidity, and corrosion affect sealant performance.
You can expect precise inspection and resealing using marine-grade materials suited for fiberglass, aluminum, and rubber roofs. The shop regularly handles roof reseals, vent resealing, skylight replacements, and leak diagnostics to prevent costly water damage.
Because the business stocks quality sealants and parts on-site, turnaround times stay short. Their familiarity with coastal deterioration patterns allows them to recommend products that maintain adhesion and flexibility even under intense sun and salt spray.
Farace’s Automotive & RV Center Services & Process
You can count on Farace’s Automotive & RV Center in Huntington Beach for precise repair, resealing, and restoration work designed to handle coastal wear. The shop’s certified technicians use proven materials and techniques that help extend the life of your RV in ocean air conditions.
How Our Certified Team Repairs, Reseals, and Protects Your RV Against Ocean Exposure
Salt air and humidity can cause early corrosion, roof leaks, and seal deterioration. The Farace team inspects each exterior seam, vent, and roof joint for cracks or weak points before applying marine‑grade sealants that resist UV and salt damage.
Technicians repair or replace damaged panels using fiberglass or aluminum restoration methods. They reseal windows, roof edges, and slide‑outs with UV‑stable silicone or polyurethane compounds tested for coastal climates.
Each service includes a moisture check and protective coating application to reduce oxidation and extend surface life. Work is completed onsite under the supervision of experienced family‑owned specialists who verify every step for quality and safety.
Conclusion & Next Steps
Choosing the right RV sealant for coastal conditions means focusing on UV stability, salt-air resistance, and waterproof performance. Proper maintenance, including routine inspections and professional service, helps extend your roof’s life and prevent costly water damage.
Keep Your RV Road-Ready Year-Round — Contact Farace’s Automotive & RV Center in Huntington Beach for Expert Roof and Sealant Service
Salt, humidity, and sun exposure in Huntington Beach can quickly wear down roof coatings and seals. Regular service ensures your RV remains protected against corrosion and leaks.
At Farace’s Automotive & RV Center, technicians use products suited for marine and coastal environments, such as silicone- and rubber-based sealants with UV inhibitors. You can schedule roof inspections, resealing, or complete coating applications to maintain optimal protection.
Services Offered:
- Roof inspection and resealing
- Leak detection and repair
- Sealant compatibility assessment
Routine maintenance at a trusted local shop helps you travel confidently, knowing your RV roof is secure and weather-resistant.