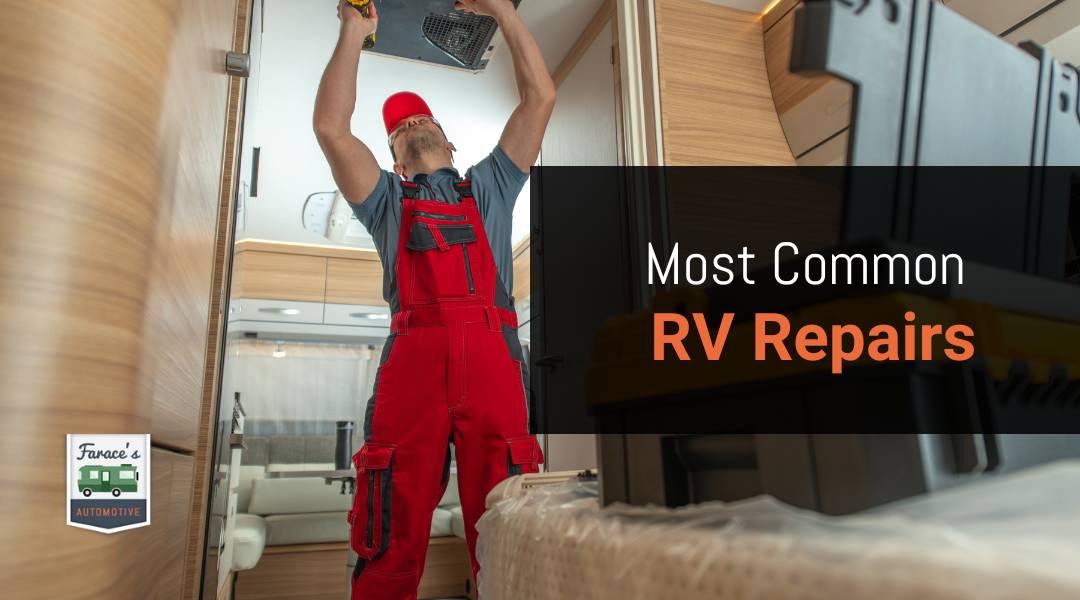
As an RV owner, being aware of common repairs can save you time and money while ensuring a safe and enjoyable journey. Understanding the top 10 RV repairs every owner should know about empowers you to maintain your vehicle effectively, minimizing unexpected issues on the road. Whether you’re a seasoned traveler or new to the RV lifestyle, having this knowledge at your fingertips can help you make informed decisions regarding maintenance and repairs.
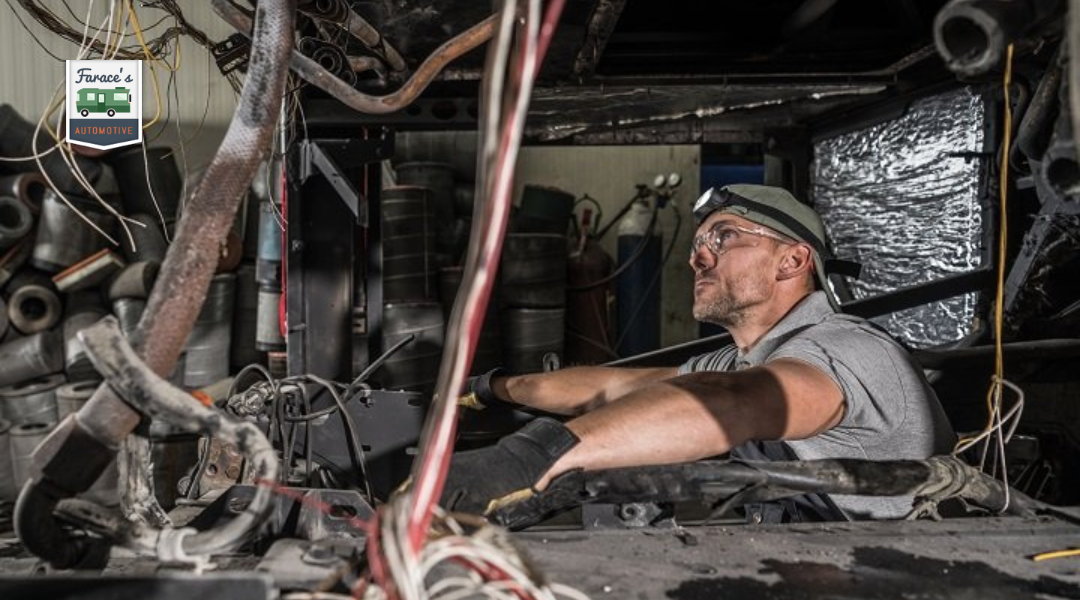
Farace Automotive & RV Center, located in Huntington Beach, California, has been providing expert RV repair services since 1976. With decades of experience, their team is well-equipped to handle a wide range of repair needs—from mechanical diagnostics to roof restorations. Recognizing these critical repairs not only enhances the longevity of your RV but also optimizes your travel experience.
This blog post will guide you through essential repairs that every RV owner should be familiar with. By preparing for these common issues, you can better enjoy your adventures and maintain the performance of your vehicle. Dive in and discover the knowledge that will keep you and your RV on the road longer.
The Importance of Regular RV Maintenance
Regular maintenance is crucial for the longevity and performance of your RV. Neglecting it can lead to serious issues that may require costly repairs.
By keeping up with maintenance, you can avoid unexpected breakdowns. This not only ensures your safety on the road but also enhances your travel experience.
Key Benefits of Regular Maintenance:
- Increased Lifespan: Routine checks can extend the life of your RV components.
- Cost Savings: Preventative maintenance can save you money by avoiding major repairs.
- Safety Assurance: Regular inspections help identify potential hazards before they become serious problems.
Essential tasks to consider include:
- Checking the Roof: Regular inspections and resealing prevent leaks.
- Fluid Changes: Follow manufacturer recommendations for oil and filter changes.
- Tire Maintenance: Inspect tire condition and pressure to avoid blowouts.
Staying proactive with your RV maintenance allows you to enjoy your travels worry-free. Remember that a well-maintained RV is not just about road performance—it’s about peace of mind. Make maintenance a priority to protect your investment and enhance your overall experience.
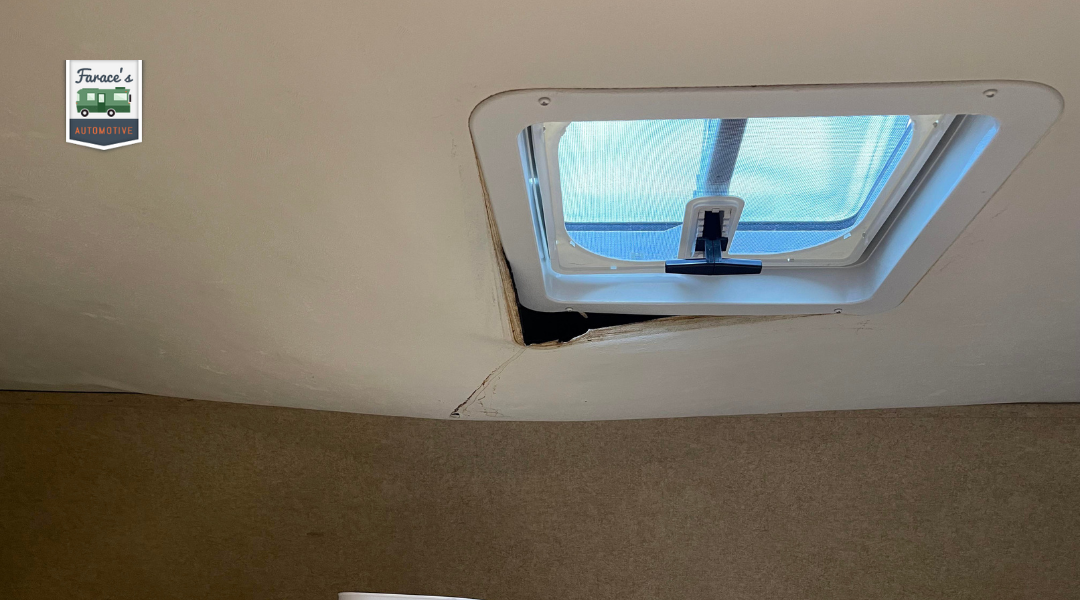
1. Fixing Leaky Roofs: Protect Your Investment
Maintaining your RV’s roof is essential to safeguarding your investment. Leaky roofs can cause significant damage to your vehicle if not addressed promptly. Understanding common causes and repair methods helps you keep your RV in top shape.
Common Causes of RV Roof Leaks
Several factors can contribute to leaks in your RV roof. Here are some primary culprits:
- Age of Materials: Over time, roofing materials can deteriorate, leading to cracks or holes.
- Weather Damage: Heavy rain, snow, or hail can weaken roof integrity.
- Poor Maintenance: Neglected roofs are more susceptible to leaks. Regular inspections are crucial.
- Seam Failures: Seams may open up due to pressure, leading to water ingress.
- Punctures or Tears: Sharp objects can puncture the roofing surface, resulting in vulnerabilities.
Identifying the source of a leak early is critical to preventing further damage.
How to Inspect and Repair a Leaky Roof
To effectively inspect your RV roof, follow these steps:
- Visual Inspection: Look for visible cracks, bubbles, or worn areas. Pay attention to seams and edges.
- Check Seals: Inspect around vents and air conditioning units. Look for deteriorating caulking that may need replacement.
- Water Testing: If leaks are suspected, use a water hose to test sections of the roof.
For repairs, consider these solutions:
- Sealant Application: Use a high-quality RV roof sealant to cover cracks or openings. This enhances water resistance.
- Coatings: Applying a protective roof coating can extend the life of your roofing materials.
- Replace Damaged Sections: If damage is severe, you might need to replace parts of the roof.
Regularly maintaining your roof will protect your RV and ensure it stays in excellent condition.
2. Troubleshooting Electrical Issues: Stay Powered On the Road
Electrical issues can disrupt your travel plans and enjoyment while on the road. Knowing how to identify and address these problems ensures that your RV remains powered and functional throughout your journey.
Identifying Common Electrical Problems
Understanding common electrical problems in your RV can save you time and frustration. Here are key issues to look out for:
- Dead or Weak Battery: If your RV struggles to start or the lights dim, it might be a battery issue. Use a multimeter to check the voltage; a fully charged battery should read around 12.6 volts.
- Faulty Alternator: A malfunctioning alternator can lead to battery drain. Signs include flickering lights or dashboard warning indicators.
- Blown Fuses: Regularly check your fuse box. A blown fuse might be indicated by non-functioning lights or appliances.
- Wiring Issues: Look for corrosion or damage in wiring harnesses. Faulty connections can lead to loss of power.
Being aware of these problems can help you troubleshoot more effectively.
Steps to Fix Electrical Outages in Your RV
When faced with electrical outages, follow these steps to get your RV back in operation:
- Check the Battery: Inspect for any corrosion or loose connections. Ensure that posts are clean and cables are tightly secured.
- Test Fuses: Remove each fuse one by one to inspect for damage. Replace any blown fuses with the correct amperage rating.
- Inspect the Wiring: Look for frayed or damaged wiring. Repair or replace any compromised wires to avoid further issues.
- Examine the Alternator: If you’re having starting issues, consider testing the alternator output. If it’s not functioning correctly, a replacement may be necessary.
- Consult a Professional: If troubleshooting doesn’t yield results, seeking expert help can prevent further damage.
By systematically assessing these components, you can maintain a reliable electrical system in your RV.
3. Water System Repair: Ensuring Clean and Reliable Water Supply
Maintaining your RV’s water system is essential for ensuring healthy and reliable water supply during your travels. You’ll need to be vigilant about diagnosing issues like leaks and low water pressure, as well as understanding how to repair and maintain your plumbing systems effectively.
Diagnosing Leaks and Low Water Pressure
To diagnose leaks, start by inspecting all visible plumbing connections, fittings, and hoses. Look for signs of moisture or water stains, as these can indicate impending leaks.
Next, check your water pressure. If you notice a significant drop while using your faucets or shower, it may signal a blockage or a leak.
Helpful tools to have on hand:
- Pressure gauge: Allows you to measure water pressure accurately.
- Soap solution: Use this to detect leaks. Apply the solution to connections and watch for bubbles forming.
Regular inspections and immediate repairs can prevent larger, costlier issues.
How to Repair and Maintain RV Plumbing Systems
Repairing RV plumbing systems often involves tightening connections or replacing worn parts. For example, if you identify a leaky faucet, you might just need to replace the washer or cartridge.
Proper maintenance practices include:
- Winterizing your system: To prevent freezing, drain your water tank and lines and add antifreeze.
- Flushing the water system: Clean out sediment and buildup in tanks and lines with a vinegar-water solution.
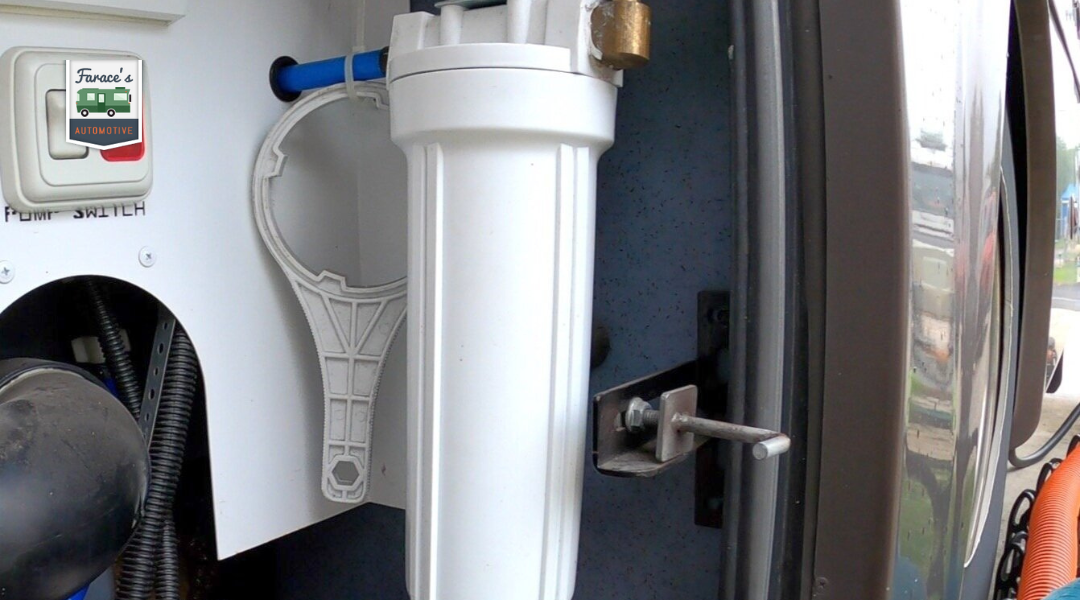
Using quality filtration systems can ensure your drinking water remains safe. Consider installing under-sink filters to improve water quality and reduce reliance on bottled water.
4. Maintaining the RV Air Conditioning System: Stay Cool on Hot Days
Proper maintenance of your RV’s air conditioning system is essential for comfort during hot days. Being aware of signs that indicate the need for repairs, as well as effective ways to keep your AC running efficiently, can enhance your travel experience.
Signs Your Air Conditioner Needs Repair
Monitoring your air conditioning system is crucial. Here are some signs to watch for:
- Weak Airflow: If airflow seems reduced, it may indicate a blockage in the ducts or a failing fan.
- Unusual Noises: Sounds like grinding or squealing can signify mechanical issues that require attention.
- Inconsistent Cooling: If the temperature fluctuates or fails to reach the set level, it may mean problems with the compressor or refrigerant levels.
- Foul Odors: Musty smells can indicate mold or mildew, while a burning smell might point to electrical issues.
Addressing these problems promptly can prevent costly repairs down the road.
How to Keep Your RV AC Running Efficiently
Regular maintenance is key to prolonging the life of your RV air conditioning system. Here are some important tips:
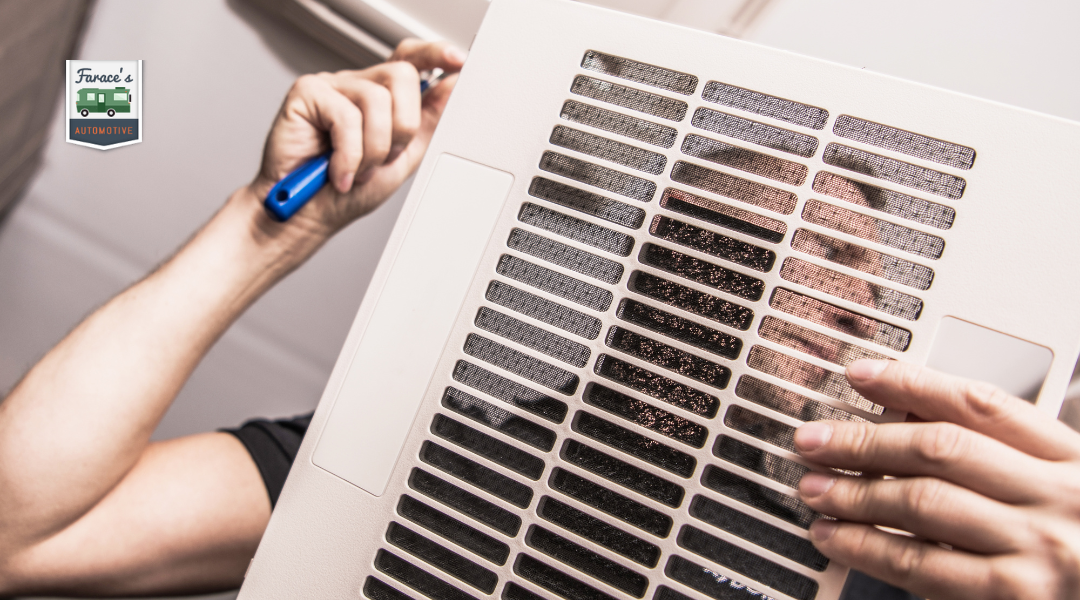
- Clean or Replace Filters: Dusty filters can restrict airflow, making your AC work harder. Check and clean them regularly.
- Inspect Ducts: Ensure that ducts are free from blockages. Seal any leaks to prevent cool air from escaping.
- Check Refrigerant Levels: Low refrigerant can be a sign of leaks; have a professional check levels and recharge as necessary.
- Regular Cleaning: Keeping the exterior unit clear of debris ensures proper airflow. Clean the fins and remove any dirt or leaves.
Implementing these strategies can keep your air conditioning system functioning optimally, ensuring a comfortable ride.
5. Fixing RV Tires: Ensuring Safety and Smooth Travel
Tire maintenance is crucial for your safety and the overall performance of your RV. Regular inspections and timely repairs can help prevent unfortunate breakdowns and enhance your traveling experience.
How to Inspect RV Tires for Damage
Begin your inspection by visually examining each tire for any signs of wear, cracks, or punctures. Look closely at the tread depth; tires should have at least 1/8 inch of tread for safe handling.
Check for uneven wear patterns, which can indicate alignment issues or improper inflation. Use a tire pressure gauge to ensure each tire meets the manufacturer’s recommended PSI.
Also, inspect the sidewalls for bulges or blisters, which can signal internal damage. Don’t forget to evaluate the valve stem for cracks or leaks. Regular checks can identify problems before they become serious.
Steps for Repairing and Replacing RV Tires
If you notice a tire is beyond repair, it’s essential to replace it promptly. Start by safely jacking up the RV, ensuring it’s stable and secure before removing the damaged tire.
Next, use a lug wrench to loosen and remove the wheel lugs in a star pattern to prevent warping. Fit the new tire onto the wheel hub, ensuring it aligns correctly with the lug bolts.
Tighten the lugs securely, again in a star pattern. Don’t forget to check the tire pressure before lowering the RV back to the ground. For damaged tires that can be repaired, patching or plugging methods are effective, but always consider consulting a professional for best practices.
6. Repairing the RV Slide-Out: Smooth Expansion and Retraction
Maintaining a smooth operation of your RV slide-out is crucial for comfort and accessibility. Here are some common problems you may encounter and practical solutions to ensure effective slide-out function.
Common Issues with Slide-Outs
Slide-outs can experience a range of issues that affect their performance. Here are the most frequent problems you might face:
- Noisy Operation: Unusual sounds during movement can indicate that the components need lubrication or maintenance.
- Misalignment: If the slide-out does not retract or expand fully, it could be due to shifting or misalignment of the mechanisms.
- Leaking: Water intrusion at the slide-out seams can signal failure of seals or caulking.
- Electrical Failures: Issues with the motor or wiring can prevent the slide-out from operating smoothly.
Identifying these problems early can help prevent further damage and costly repairs.
How to Fix Slide-Out Mechanisms
When addressing slide-out issues, you’ll want to follow a systematic approach:
- Lubrication: Use a suitable lubricant, like Camco Slide-Out Lube, to keep rails and gears moving freely.
- Inspect Hardware: Check for loose or missing bolts, nuts, and screws. Tighten or replace as needed.
- Align Tracks: If misalignment occurs, adjust the slide-out tracks carefully so they line up properly when extended.
- Seal Inspection: Regularly examine seals for cracks or wear. Replace seals as necessary to prevent leaks.
- Test Electrical Connections: Make sure all electrical connections are secure. Replace faulty wiring to ensure dependable operation.
By keeping these points in mind, you can effectively handle common slide-out repairs and enhance the longevity of your RV.
7. Brake System Maintenance: Keep Your RV Safe on the Road
Maintaining your RV’s brake system is crucial for safety while traveling. Regular checks and timely repairs can prevent dangerous situations and ensure reliable performance.
How to Check Brake Pads and Rotors
To ensure optimal braking performance, regularly inspect your brake pads and rotors. Start by removing the wheel to access the brake components. Look for wear indicators on the pads; if they are less than 1/4 inch thick, it’s time for replacement. Check rotors for grooves or discoloration, which can indicate overheating.
You can also perform a visual inspection for any rust or corrosion. If you feel vibrations or hear squeaking noises while braking, these can signal issues as well. Using a caliper tool, measure rotor thickness; it should meet manufacturer specifications. Keeping track of these details can help maintain your RV’s braking efficiency.
Repairing RV Brake Systems: When to Seek Professional Help
Not all brake issues can be handled as DIY projects. If you notice any significant problems, such as a spongy brake pedal or unusual noises, it’s advisable to consult a professional. Brake fluid leaks are particularly concerning and can imply deeper issues, requiring expert diagnosis.
Professional brake services typically include comprehensive inspections and repairs for all components, including lines, cylinders, and ABS systems. A certified technician can also perform necessary calibrations, ensuring that your braking system works optimally under all conditions. Prioritizing safety through expert help can significantly enhance your peace of mind on the road.
8. Furnace and Heating System Repairs: Stay Warm in Cold Weather
Maintaining your RV’s furnace and heating system is crucial for comfortable winter travels. Understanding how to diagnose issues and knowing the repair steps can keep you warm during your adventures.
Diagnosing Furnace Issues in Your RV
When your RV furnace fails, you need to identify the root cause. Common problems include:
- Electrical Issues: Check the wiring and fuses. Damaged wiring or blown fuses can disrupt power.
- Faulty Thermostat: Ensure the thermostat is functioning properly. A malfunctioning thermostat can lead to heating issues.
- Insufficient Propane: If your furnace runs on propane, check the tank levels. Low propane can halt furnace operation.
- Clogged Air Filters: Dirty filters can restrict airflow, causing the furnace to work inefficiently.
Use a multimeter to test electrical components. You can also check for error codes if your furnace has a diagnostic display.
Step-by-Step Guide to Fixing RV Heating Systems
Once you’ve diagnosed the problem, follow these steps to carry out repairs:
- Disconnect Power: Always turn off power to the furnace before beginning repairs to ensure safety.
- Inspect Components: Examine the blower motor, circuit board, and other components for signs of wear or damage.
- Clean or Replace Filters: Remove any clogged filters and clean or replace them as needed.
- Test Thermostat: If the thermostat is faulty, replace it. Ensure new thermostats are calibrated correctly.
- Reconnect and Test: After repairs, reconnect all components and restore power. Test the system to ensure it’s heating properly.
By following these steps, you can effectively troubleshoot and repair your RV’s heating system, ensuring a warm and comfortable experience.
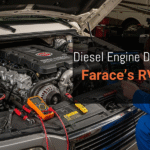
9. Transmission and Engine Repairs: Ensure Long-Term Vehicle Performance
To maintain the longevity and performance of your RV, understanding transmission and engine repairs is essential. Identifying early signs of problems can save you significant time and money. Regular maintenance strategies are key to ensuring your vehicle operates smoothly.
Identifying Signs of Transmission Problems
Pay attention to your RV’s transmission as it plays a crucial role in its overall performance. Here are some signs that indicate potential transmission issues:
- Slipping Gears: If your RV unexpectedly changes gears or struggles to stay in gear, it’s a clear signal of trouble.
- Delayed Engagement: Noticing a delay when shifting from park to drive can be concerning.
- Fluid Leaks: Transmission fluid is typically red. Any leaks beneath your vehicle may indicate a need for repair.
- Unusual Noises: Listen for grinding, clunking, or whining sounds when operating your RV.
Being proactive in recognizing these symptoms will help you address problems early, ensuring your RV’s efficiency and safety.
Basic Engine Maintenance and Troubleshooting Tips
Regular engine maintenance not only enhances performance but also extends its lifespan. Here are essential tips to keep your engine running smoothly:
- Check Engine Oil: Always monitor oil levels and quality. Replace it based on your RV’s manual recommendations.
- Inspect Air Filters: Clogged air filters can reduce fuel efficiency. Replace them regularly to maintain optimal airflow.
- Battery Maintenance: Inspect your battery terminals for corrosion and ensure a secure connection to avoid starting issues.
- Listen for Irregular Sounds: Unusual noises, such as knocking or hissing, can be indicators of serious engine problems. Don’t ignore them.
Following these tips can help you troubleshoot minor issues before they escalate, preserving your RV’s performance.
10. Dealing with RV Exterior Damage: Maintaining Your RV’s Appearance
Maintaining the exterior of your RV is crucial for both aesthetics and longevity. Regular attention will help you avoid costly repairs and ensure a pleasant travel experience. Below are some common issues and cleaning techniques to protect your investment.
Common Exterior Issues and How to Repair Them
Your RV’s exterior can face several issues, including fading paint, scratches, and oxidation.
- Fading Paint: Sun exposure can cause the paint to lose its luster. Consider using a high-quality RV wax to restore the shine.
- Scratches: For minor scratches, automotive touch-up paint can blend well and offer protection.
- Oxidation: This appears as a chalky film on the surface. Utilize a dual-action polisher and polishing compound to remove oxidation effectively.
- Sealing Leaks: Inspect seams, vents, and windows regularly. If you find cracks or openings, apply rubber sealant or RV-specific caulk to prevent water damage.
Addressing these issues promptly can prevent further deterioration and preserve your RV’s exterior.
How to Properly Clean and Protect Your RV’s Exterior
Regular cleaning is key to maintaining your RV’s appearance.
- Choose the Right Soap: Use a soap designed for RVs, avoiding wax-based products that can damage the finish.
- Gentle Cleaning: Use a soft sponge or microfiber cloth to wash, and start from the top down to prevent streaking.
- Rinsing: Thoroughly rinse away soap to avoid residue.
- Drying: After cleaning, dry your RV with a soft towel to prevent water spots.
- Protective Coatings: Consider applying a UV protectant spray to help shield against sun damage.
By consistently cleaning and protecting your RV’s exterior, you’ll enhance its longevity and keep it looking great on the road.
Expert Tips: How to Prevent Common RV Repairs
Maintaining your RV can prevent many common repairs. Here are some essential tips to keep your vehicle in top shape.
1. Regular Inspections
Inspect your RV at least twice a year. Check the roof for leaks, the undercarriage for rust, and all seals and joints.
2. Routine Maintenance
Follow your manufacturer’s maintenance schedule. Change oil, filters, and inspect brake systems regularly.
3. Tire Care
Maintain proper tire pressure and inspect for abnormal wear. Rotate tires every 5,000 to 6,000 miles to ensure even wear.
4. Electrical System Checks
Test your electrical system regularly. Look for exposed wires and ensure all connections are secure.
5. Plumbing Maintenance
Check your plumbing for leaks or clogs. Winterize your RV by draining water systems if you won’t be using it in cold weather.
6. Proper Storage
When storing your RV, use a breathable cover. This protects it from the elements and reduces wear on the exterior.
7. Keep It Clean
Regularly wash and wax your RV. This helps to protect the paint and prevent oxidation.
8. Awareness of Weight Limits
Avoid overloading your RV. Check your weight limits to ensure safe driving and prevent damage.
Implementing these tips will help you minimize the risk of repairs and keep your RV performing well.
Key Statistics on RV Repairs and Maintenance Costs
Understanding the costs associated with RV repairs and maintenance is crucial for every owner. Here are some key statistics to consider:
- Average Repair Costs: Owners can spend anywhere from $300 to $1,000 for minor roof repairs. For major repairs, costs can reach up to $5,000 for a full roof replacement.
- Maintenance Expenses: According to data, the total RV costs for repairs and maintenance can average around $862 per month over a period. This typically includes necessary mechanical repairs and maintenance.
- DIY Savings: Many repairs can be performed by owners, leading to significant savings. For instance, DIY efforts contributed to a cost of $23,268 over 27 months for essential maintenance.
- Long-Term Financial Planning: If you use your RV frequently, engine and chassis maintenance costs may increase based on mileage and usage. Owners should plan for variable expenses depending on travel frequency.
- Rising Ownership: With RV ownership increasing by 62% since 2001, more owners are navigating these costs than ever before.
Being aware of these statistics can help you budget effectively for necessary repairs and maintenance. Regular upkeep not only extends the life of your RV but also enhances your travel experiences.
Conclusion: Proactive RV Maintenance Saves Time and Money
Routine maintenance is essential for an RV owner to prevent costly repairs down the road. By addressing minor issues promptly, you can ensure your vehicle remains in optimal condition, enhancing your travel experience.
Ready to Tackle Your Next RV Repair?
Staying attentive to your RV’s condition helps you avoid unexpected breakdowns. Create a comprehensive maintenance checklist that includes items such as checking tire pressure, inspecting fluid levels, and examining the roof for leaks.
Regular inspections can reveal small problems before they escalate. For example, a cracked seal can lead to water damage if not addressed early. Utilize services that specialize in RV care for expertise in repairs and advice.
By investing in routine maintenance, you not only extend the life of your RV but also enhance its resale value. A well-maintained vehicle is more likely to attract serious buyers when the time comes to upgrade.