For RV owners, installing a backup camera is one of the most practical upgrades to improve safety and ease when maneuvering large vehicles. An RV backup camera provides clear visibility behind the vehicle, reducing blind spots and helping to prevent accidents during parking and reversing. This guide from Farace Automotive & R.V. Center breaks down what buyers need to know about choosing the right system and how to install it properly.
Farace Automotive & R.V. Center, a trusted RV repair shop in Huntington Beach, California, combines decades of experience with technical expertise to support RV owners in maintaining and upgrading their vehicles. Whether towing a trailer or driving a motorhome, their professional insights make the process straightforward, ensuring the camera system integrates seamlessly with existing equipment for optimal performance and safety.
Understanding the types of backup cameras available, the installation steps, and key features to look for can save time and money. This guide aims to equip readers with clear information so they can confidently choose and install the best backup camera tailored to their RV needs.
Why RV Backup Cameras Are Essential
RV backup cameras improve visibility and control when maneuvering, especially in tight spaces. They reduce the chance of accidents by showing blind spots and enhance overall vehicle security. Additionally, they can affect insurance considerations by lowering risk factors.
Enhanced Safety While Reversing
Backing up an RV is challenging due to its size and limited rearward visibility. Backup cameras provide a real-time view of what’s behind the vehicle, allowing drivers to detect obstacles, pedestrians, or other vehicles.

This increased visibility dramatically reduces the risk of collisions or property damage. Many systems include features like night vision and wide-angle lenses, adding safety in low light or complex environments. Drivers can react more quickly and avoid costly accidents with these clear visuals.
Minimizing Blind Spots in Large RVs
Large RVs have significant blind spots, especially on the sides and directly behind. Backup cameras eliminate these blind zones by offering a wide, unobstructed view.
The camera’s mounting position and design cover areas often missed by mirrors. This helps drivers navigate crowded campgrounds or parking lots more confidently. Some systems also support multiple cameras for full 360-degree coverage, which further enhances situational awareness.
Insurance and Liability Benefits
Installing an RV backup camera system can influence insurance premiums by lowering perceived risk. Insurers may view vehicles equipped with backup cameras as less likely to be involved in accidents.
This can lead to discounts or more favorable policy terms. In the event of a claim, footage from cameras can provide clear evidence, potentially reducing liability disputes. Thus, a backup camera not only improves safety but also offers financial and legal advantages for RV owners.
Types of RV Backup Cameras
RV backup cameras vary in how they connect, the viewing angles they offer, and the types of monitors they use. These differences affect installation complexity, image coverage, and user interface. Selecting the right type depends on the RV’s layout and the driver’s specific needs.
Wired vs. Wireless Systems
Wired backup cameras connect directly to the RV’s monitor or power source with cables. This provides a stable, interference-free video signal and consistent power. However, installation involves running wires through the vehicle, which can be time-consuming and may require professional help.
Wireless systems transmit video signals over Wi-Fi or radio frequencies to the display device. They are easier and faster to install, requiring fewer modifications to the vehicle. The main drawback is potential signal interference or delay, especially around electronic equipment or metal surfaces.
Rearview vs. Multi-Angle Systems
Rearview cameras provide a single camera view focused on the area directly behind the RV. They are simpler and usually less expensive. However, their coverage angle is limited to a narrow field behind the vehicle.
Multi-angle systems use multiple cameras positioned around the RV to provide views from the sides and rear. This improves situational awareness by reducing blind spots. Drivers benefit from split-screen or 360-degree views, which assist in tight backing maneuvers and parking.
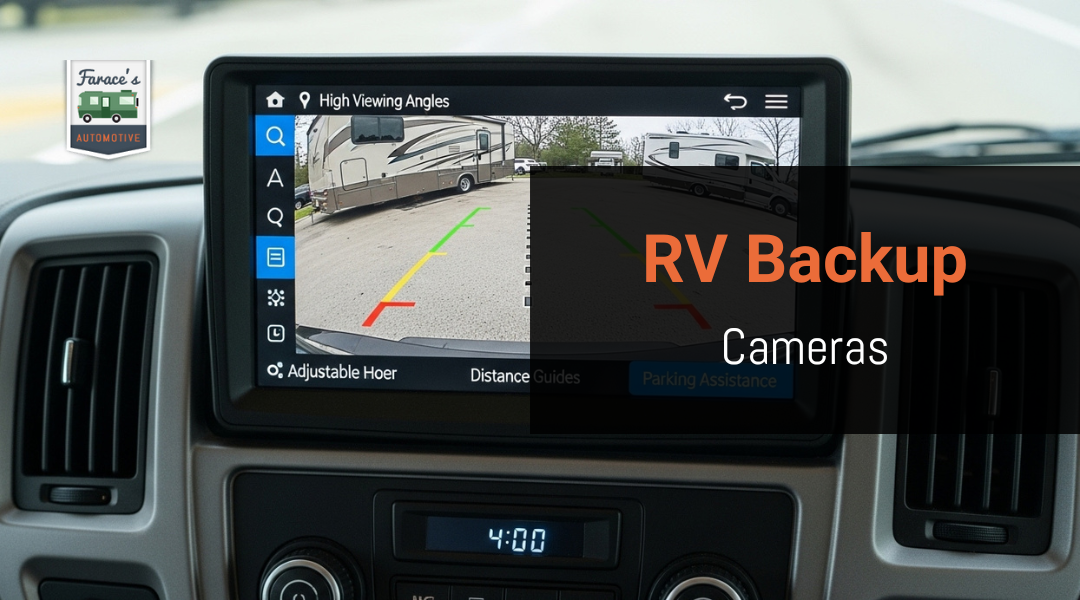
Monitor Options: Dashboard Screens, Mirror Displays, and Mobile Apps
Backup camera monitors come in three main forms. Dashboard screens are dedicated LCD or LED displays mounted near the driver. They provide a large, clear image but require wiring and mounting space.
Mirror displays integrate the camera feed into the rearview mirror, saving space and reducing distraction. This option usually offers a smaller screen but keeps the image in the driver’s natural line of sight.
Mobile apps use smartphones or tablets as displays. They connect wirelessly to the camera system, allowing flexible screen placement. Mobile displays depend on device battery life and may experience connection delays.
Key Features to Look for When Buying an RV Backup Camera
Selecting the right RV backup camera involves careful consideration of visibility, durability, and compatibility with existing systems. Essential qualities include the camera’s ability to perform in varied lighting, withstand weather conditions, provide a broad and clear field of view, record footage, and work seamlessly with other vehicle devices.
Night Vision and Low-Light Performance
Effective night vision is critical for safe backing in dark or poorly lit areas. The camera should use infrared LEDs or other low-light sensors to capture clear images without excessive glare or distortion.
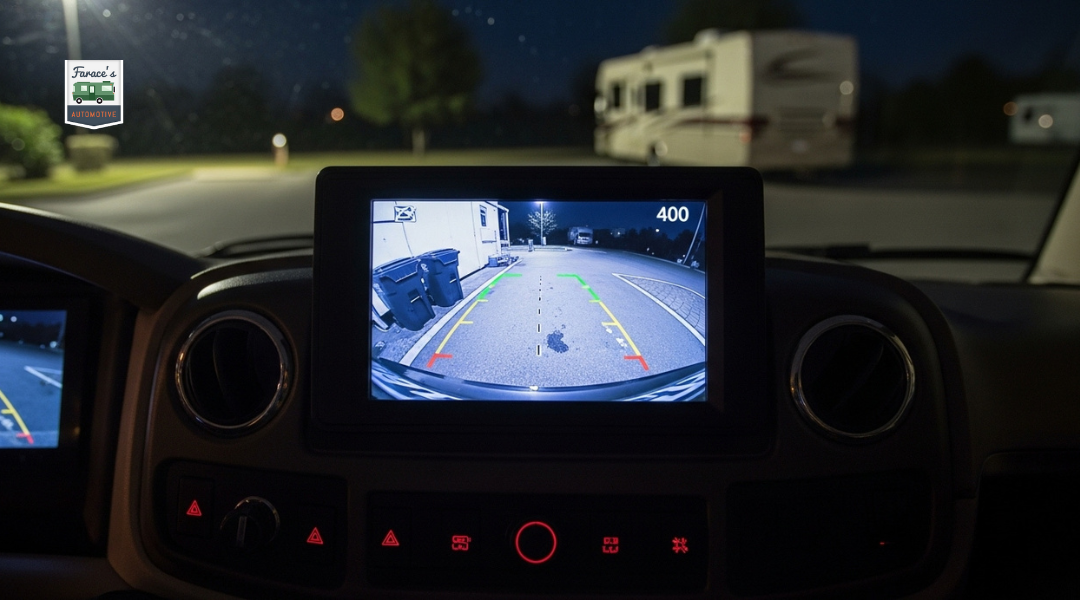
Look for cameras with automatic brightness adjustment to prevent washed-out views when lighting changes suddenly. Some units offer color night vision for enhanced detail, which can help identify obstacles more quickly.
Low-light performance ensures the driver can see curbs, poles, and pedestrians in dim conditions, reducing the risk of accidents during nighttime maneuvers.
Weatherproof and Durability Ratings
An RV backup camera must resist elements like rain, dust, and extreme temperatures. Waterproof ratings of IP67 or higher guarantee protection against water jets and submersion for short periods.
Durability also includes resistance to vibration and shocks, critical on rough roads or uneven terrain. Cameras designed with sturdy housings and corrosion-resistant materials will maintain function longer.
Check manufacturer specifications for temperature ranges and coatings that prevent fogging or lens scratches, ensuring reliable use in diverse environments.
Wide-Angle Lenses and Resolution
Wide-angle lenses provide expansive coverage behind the RV, minimizing blind spots during reversing. Cameras with viewing angles between 120 and 180 degrees are ideal for comprehensive visibility.
Resolution affects image clarity and detail. A camera with at least 720p HD resolution offers sharper images, helping drivers detect smaller hazards and read distance markers.
Combining high resolution with a wide field of view improves safety by giving a precise and broad picture of the area behind the RV.
Recording Capabilities and Storage Options
Backup cameras with recording functions add a layer of security by capturing incidents or near-misses on the road. Continuous or motion-triggered recording options are common.
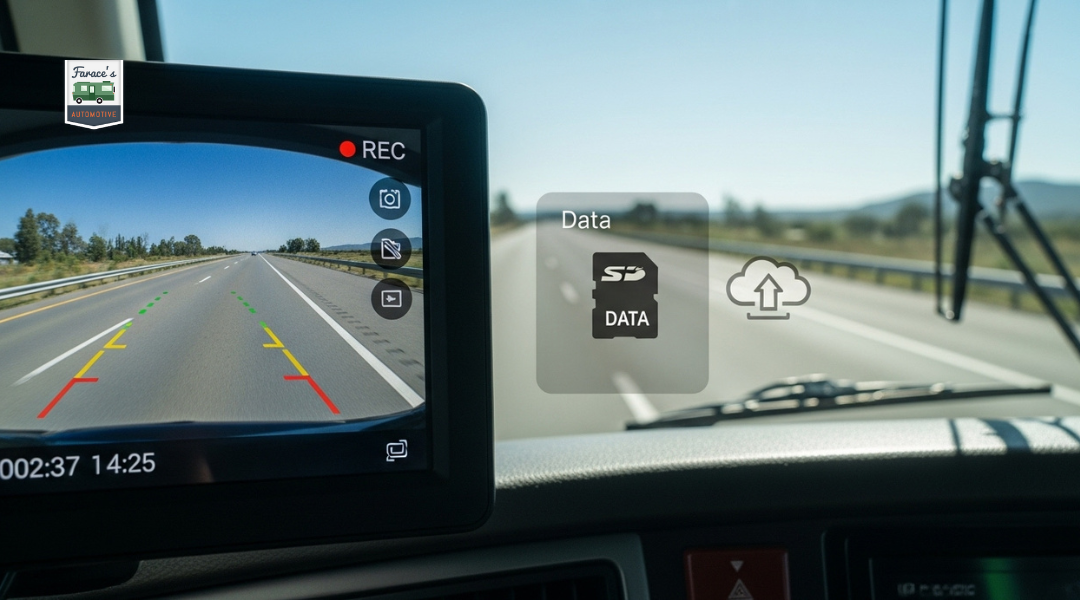
Storage types vary, including built-in memory, SD cards, or cloud-based solutions. Cameras with expandable storage allow users to save more footage and manage files as needed.
Recording quality, frame rate, and ease of file access are important factors to consider for useful and reliable video evidence.
Integration with GPS or Other Vehicle Systems
Cameras that integrate with GPS units or vehicle monitoring systems create a cohesive setup for easier navigation and safety management. Real-time data from GPS can enhance backup guidance with speed-related alerts.
Some systems link to RV alarms or engine diagnostics, offering a centralized control interface. This integration can reduce distraction by consolidating essential information on one screen.
Compatibility with existing RV electronics and ease of installation are important to maintain streamlined operation without complex modifications.
Step-by-Step Installation Guide
Installing an RV backup camera requires attention to detail in selecting tools, mounting location, wiring, and system setup. Safety considerations and expert advice help ensure reliable operation and clear visuals during reversing.
Tools and Materials Needed
The essential tools include a power drill, screwdrivers, wire strippers, electrical tape, and a multimeter for testing connections. Materials to have on hand are the backup camera kit, mounting brackets, wiring harnesses (for wired systems), and zip ties.
It is crucial to use weather-resistant connectors and sealed mounts to protect against moisture and vibration. For wired setups, choose wires rated for automotive use. A wire crimper and a fuse tap kit improve the quality and safety of electrical connections.
Choosing the Right Mounting Position
The ideal mounting spot provides a clear, unobstructed rear view. Common locations include above the license plate, on the tailgate, or near the top brake light.
Mount the camera low enough to show the area behind the trailer but high enough to avoid damage from road debris. The angle should capture a wide field of view without distortion or excessive glare. The mount must be secure and allow easy adjustment after installation.
Wiring and Power Setup (Wired Systems)
Wired backup cameras need a reliable power source, typically taken from the reverse light circuit. This ensures the camera activates automatically when the vehicle is in reverse.
Run the wiring harness neatly through the RV frame, avoiding hot or moving parts. Connect the camera’s power and ground wires to the corresponding reverse light wires using secure, insulated connectors. Test the connection with a multimeter before finalizing the installation.
Syncing with Monitors (Wireless Systems)
Wireless backup cameras must be paired with the monitor in the cab or RV interior. Most systems include a transmitter and receiver that communicate on a dedicated frequency.
Follow the manufacturer’s pairing process to connect the camera and monitor. Ensure the signal is strong and interference-free for a clear image. Position the monitor conveniently for the driver’s direct line of sight and adjust brightness to different lighting conditions.
Safety Precautions and Tips from the Pros at Farace Automotive
Before starting, disconnect the RV battery to prevent electrical shorts. Double-check all connections for proper insulation to avoid corrosion.
Farace Automotive experts advise testing the camera during daylight and at night to confirm visibility and angle. Regular maintenance of wiring and mounts prolongs system life. Using products rated for automotive use ensures durability in diverse weather conditions.
Professional Installation vs. DIY: What’s Best for You?
Choosing between professional installation and a DIY approach involves weighing factors like technical skill, time, cost, and system reliability. Each option has important advantages and challenges that affect the overall functionality and safety of an RV backup camera system.
Pros and Cons of DIY Installation
DIY installation offers control over the process and can be less expensive upfront. It suits those familiar with vehicle electronics and comfortable working with wiring and mounting hardware.
However, DIY can lead to common issues such as incorrect camera positioning, wiring errors, or insufficient waterproofing. These mistakes may reduce the system’s effectiveness or cause damage to the RV’s electrical system. Time spent troubleshooting can also grow quickly, especially for larger or more complex vehicles.
DIY is best for users with technical aptitude and access to detailed installation guides or support resources.
Benefits of Professional Installation at Farace’s
Farace Automotive & R.V. Center provides expert installation tailored to each RV’s specific layout. Technicians ensure cameras are mounted for optimal field of vision and securely wired into the vehicle’s electrical system.
Professionals also test and calibrate the system, reducing the risk of post-installation problems. Their experience minimizes the chance of electrical hazards or interference with other vehicle components.
Installation at Farace’s guarantees a reliable, fully integrated backup camera, backed by professional service and warranty options, which enhances long-term value.
Cost Considerations and Time Investment
DIY installation typically saves money initially, with costs limited to parts and tools. But unexpected complications can lead to additional expenses on repairs or replacements.
Professional installation carries a higher upfront fee, but it often means faster completion and fewer issues. For many RV owners, this time savings and peace of mind outweigh cost differences.
Considering the complexity of running wiring through tight spaces and connecting to vehicle systems, professional service helps avoid frustration and ensures proper function from the start.
Maintenance and Troubleshooting Tips
Proper maintenance and quick troubleshooting can extend the life of an RV backup camera and maintain its reliable performance. Regular care involves keeping the lens clear, addressing any power or signal interruptions, and knowing when the system requires replacement or upgrading.
Keeping Your Camera Lens Clean and Functional
Dirt, dust, and water spots are the most common causes of poor camera image quality. The lens should be cleaned regularly using a soft microfiber cloth to avoid scratches.
If the camera is mounted near the ground or exposed to road grime, more frequent cleaning may be necessary. Avoid harsh chemicals; mild soap and water work best for removing stubborn debris.
Check for physical damage or cracks on the lens housing, as these can allow moisture to enter, impairing function. Keeping the lens clear ensures the camera provides a sharp, accurate view while reversing or towing.
Common Signal or Power Issues
Signal loss or picture flickering often points to wiring problems or weak connections. Inspect all connectors between the camera and receiver for corrosion, looseness, or damage.
Power issues may arise from faulty fuses or battery backup failures. Test fuses regularly and replace them if blown. A weak or dead camera battery can cause intermittent operation.
Interference from other electronic devices inside the RV can disrupt the signal. Using shielded cables or relocating the receiver can reduce interference. Consistent voltage supply and secure wiring are key to stable camera performance.
When to Replace or Upgrade Your System
Signs that a backup camera system should be replaced include chronic image fuzziness, frequent signal dropouts, or physical damage to the camera or monitor.
Upgrading to a higher resolution camera or a system with night vision and wider viewing angles can improve safety and usability. Compatibility with RV electronics and ease of installation should be considered before purchasing.
Advancements like wireless systems simplify installation and reduce wiring issues. When replacement is necessary, choosing a system designed specifically for RV use offers better durability against weather and road conditions.
Why Choose Farace Automotive & R.V. Center for Installation
Farace Automotive & R.V. Center offers specialized services tailored to RV owners seeking reliable backup camera installation. Their deep industry knowledge, customized approach, and commitment to quality set them apart. Clients benefit from personalized service backed by decades of hands-on experience.
Over 40 Years of Experience in RV Services
Operating since 1976, Farace Automotive & R.V. Center has built extensive expertise in RV repair, service, and technology integration. Their long tenure means technicians are familiar with a wide range of RV models and common challenges.
This experience ensures installations are done right the first time, minimizing issues from improper fit or electrical problems. Customers have access to technicians who understand the unique needs of RV backup camera systems.
Their familiarity with RV wiring, power sources, and vehicle structure improves both performance and durability of installed cameras.
Custom Installation Solutions for All RV Types
Every RV is different in size, layout, and electrical setup. Farace Automotive provides tailored installation plans specific to the client’s vehicle type—whether motorhomes, travel trailers, or fifth wheels.
They assess placement options, wiring routes, and monitor integration to ensure optimal functionality. This customization enhances visibility, safety, and ease of use during driving or parking.
By avoiding one-size-fits-all approaches, they optimize camera positioning to reduce blind spots and accommodate RV-specific features like slide-outs or rear ladders.
Veteran-Owned, Family-Operated Commitment to Quality
As a veteran-family-owned business, Farace Automotive & R.V. Center emphasizes trust, reliability, and personalized service. Their reputation is grounded in consistent quality workmanship and attention to customer needs.
The family operation ensures that every project receives care and accountability typically lost in larger or corporate chains. They prioritize clear communication and steady follow-up, providing peace of mind throughout the installation process.
This business model reinforces their dedication to maintaining longstanding client relationships rather than quick, transactional work.
Customer Testimonials and Satisfaction Guarantee
Several customers praise Farace Automotive & R.V. Center for professionalism, timeliness, and quality installations. Reviews highlight their knowledgeable staff and transparent pricing.
The center offers a satisfaction guarantee, reinforcing confidence in their services. If issues arise after installation, they respond promptly to address and rectify them.
This commitment to customer satisfaction is a key factor in their strong local reputation and repeat clientele.